In this article
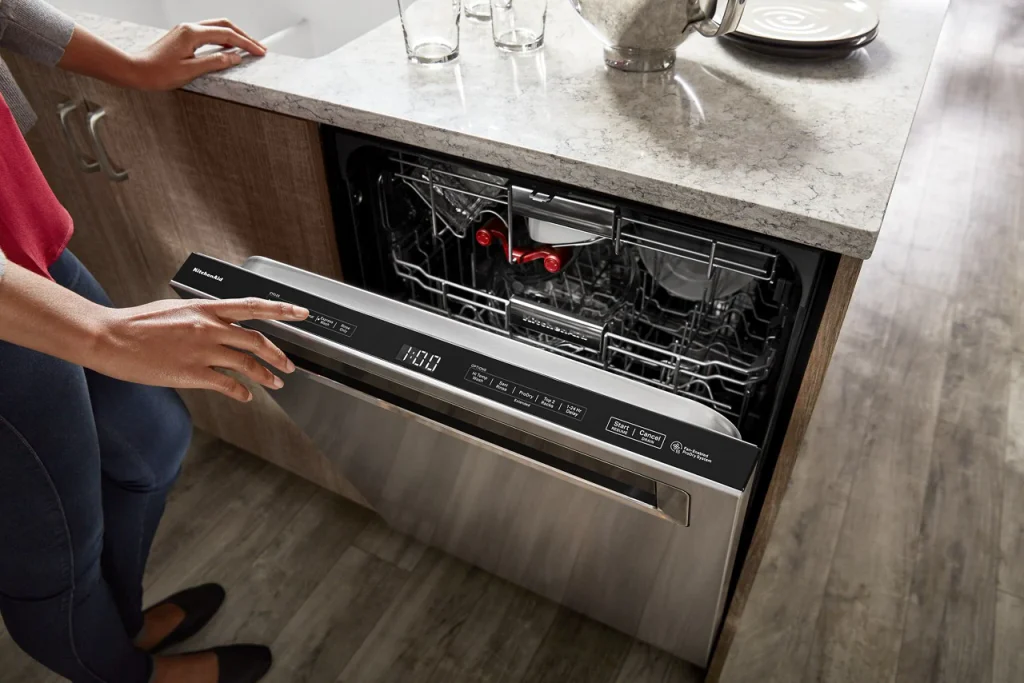
A KitchenAid dishwasher is built to run quietly and clean hard, but it can’t clean itself forever. Food bits settle on the tub floor, the filter clogs, spray arm holes block up and the door seals collect a grey film. Then the dishes start coming out gritty and the tub smells stale. Here’s how to clean a KitchenAid dishwasher the right way: turn off the power, pull the bottom rack, clear the floor, twist out and wash the filter, unclog the spray arms, wipe the inside and door seals with warm soapy water, then deodorize with a hot vinegar cycle followed by a short baking soda cycle.
The whole job takes about an hour, and most of that is the machine running. You don’t need special tools, just things already in your kitchen. Below, the Repairior editorial team walks through each step in the order technicians do it, explains where the KitchenAid filter is and how it comes out, and covers what to do when cleaning doesn’t fix the problem.
Why Your KitchenAid Dishwasher Needs Regular Cleaning
Most KitchenAid dishwashers made in the last decade use a manual-clean filter instead of a noisy grinder. That’s a big part of why they run so quietly. The trade-off is that the filter holds onto everything it catches until you clean it. Leave it for a few months and you get a predictable chain of problems:
- Water can’t flow freely through the filter, so the wash pump pushes less water to the spray arms.
- Small particles get recirculated and land back on your dishes as grit or a cloudy film.
- Trapped food starts to rot in warm water, which is where that sour smell comes from.
- Moisture and grease on the door seals give mold and mildew a place to grow.
In our experience, the majority of “my KitchenAid isn’t cleaning anymore” complaints are solved by the cleaning routine below rather than a repair.
| What you notice | Most likely cause | Step that fixes it |
|---|---|---|
| Gritty bits or sand-like residue on dishes | Clogged filter | Step 3 |
| Top rack dishes stay dirty | Blocked spray arm holes | Step 4 |
| Sour or rotten smell | Food in the filter and on the tub floor | Steps 2, 3 and 6 |
| Musty smell, dark spots on the seal | Mold or mildew on door seals | Step 5 |
| White, cloudy film on the tub | Hard water mineral buildup | Step 6 |
What You’ll Need
- Paper towels and a soft cloth or sponge
- A soft brush (an old toothbrush works well)
- Liquid dish soap and a bowl or sink of warm water
- Toothpicks or a small brush for the spray arm holes
- 1 cup of white vinegar and a dishwasher-safe cup or bowl
- 1 cup of baking soda
- Rubber gloves (food bits and broken glass hide in the sump)
How to Clean a KitchenAid Dishwasher Step by Step
Step 1: Turn off the power first
Before you reach into the tub, make sure the dishwasher is turned off and has no power. If it plugs in under the sink, unplug it. If it’s hardwired, switch off its circuit breaker. You’ll be putting your hands near the heating element and moving parts, and some KitchenAid models can start a cycle if a button is bumped while the door is open.
Also give it time to cool down if you just ran a load. The heating element and the water in the sump can stay hot for a while.
Step 2: Remove the bottom rack and clear the tub floor
Slide the bottom rack all the way out and set it aside. Now take a good look at the floor of the dishwasher. You’ll almost always find leftover food hanging around down there: rice, pasta, seeds, bits of label, sometimes a lost lid or a shard of glass.
Grab a paper towel or a soft brush and pick everything up. Work around the base of the lower spray arm and the edges of the tub. Getting this debris out first stops it from washing straight into the filter area while you work.
Step 3: Twist out and clean the filter
Your KitchenAid dishwasher has a filter that catches food particles and debris before the water recirculates. It sits at the bottom of the tub, right near the lower spray arm. On most models:
- Remove the upper filter assembly. It’s the round part with a handle in the center of the floor. Turn it counterclockwise about a quarter turn and lift it straight out.
- Remove the lower filter. With the upper part out, the flat lower filter underneath can be lifted slightly and pulled forward and out.
- Rinse both under warm running water. Most of the loose gunk washes right off.
- Scrub if it’s grimy. If the mesh looks greasy or dark, add a little dish soap and work it gently with a soft brush, inside and out. Don’t use a wire brush or scouring pad; the fine mesh tears easily.
- Soak if it smells. For a really neglected filter, let it sit in hot soapy water for 10–15 minutes before scrubbing.
While the filter is out, wipe the opening it sits in with a damp cloth or paper towel. A small amount of water there is normal. Pull out any food or glass you can see, wearing gloves.
To reinstall, slide the lower filter back under its tabs, set the upper assembly in place and turn it clockwise until it locks. The alignment marks should line up. Don’t run the dishwasher without the filter in place; debris can reach the pump and damage it.
Step 4: Remove and unclog the spray arms
The spray arms are what actually get your dishes clean, so they need to be in top shape. Over time, small seeds, grains and mineral scale lodge in the tiny holes and weaken the spray.
- Remove the arms. On most KitchenAid models the lower arm pulls straight up off its post. The upper or mid-level arm under the top rack usually unscrews or unclips. Most just pop off with a firm pull.
- Check every hole. Hold the arm up to the light. Any hole you can’t see through is blocked.
- Clear the blockages. Push a toothpick or small brush into each hole to dislodge what’s stuck. Shake the arm to let loosened debris fall out.
- Rinse under warm water. Run water through the arm’s center opening to flush everything out.
- Snap them back in place. Reinstall each arm and spin it by hand. It should turn freely without catching on anything.
If dishes on the top rack have been coming out dirty, this is usually the step that fixes it.
Step 5: Wipe down the interior and door seals
Fill a bowl with warm water and a few drops of dish soap. Using a soft cloth or sponge, give the inside of the dishwasher a good wipe down: the tub walls, the inside of the door, the racks’ rails and the detergent dispenser area.
Pay special attention to the door seals. The rubber gasket around the tub and the bottom edge of the door are sealed off from the spray during a cycle, so grease and moisture sit there untouched. Left unchecked, they can harbor mold and mildew. Run the cloth along every fold of the gasket, and use the soft brush in the corners and along the bottom lip of the door where it hinges down.
If you see black spots that won’t wipe off, that’s mold. Our guide on how to clean a moldy dishwasher covers stubborn mold on seals and rack rails.
Step 6: Deodorize with a hot vinegar cycle
Put the bottom rack back in, restore power and make sure the dishwasher is completely empty. Fill a dishwasher-safe cup or bowl with about 1 cup of white vinegar and set it upright on the top rack.
Run a hot water cycle, such as Heavy, Pots and Pans, or Normal with the high-temperature option. The vinegar mixes into the wash water and works through the tub, arms and hoses. It neutralizes lingering odors and loosens the white mineral film hard water leaves behind.
Step 7: Finish with baking soda and a short cycle
For an extra boost, once the vinegar cycle is done, sprinkle about 1 cup of baking soda across the bottom of the dishwasher. Run a short or rinse cycle on hot.
The baking soda helps knock out stubborn smells and brightens the tub. Don’t put the two in at the same time; running them separately lets each one do its own job.
Step 8: Dry it out and clean the outside
When the last cycle finishes, open the door and leave it cracked so the inside can air dry. A dry tub is the best protection against mold coming back.
For the exterior, wipe the door and handle with a soft cloth dampened with warm, soapy water. On stainless steel, wipe with the grain and dry with a microfiber cloth to avoid streaks. Spray cleaners onto the cloth rather than directly onto the control panel.
How to Clean the Filter in a KitchenAid Dishwasher (and How Often)
If you only do one thing from this guide, clean the filter. Here’s a quick reference:
| Filter part | Where it is | How it comes out | How to clean it |
|---|---|---|---|
| Upper filter assembly | Center of the tub floor, near the lower spray arm | Turn counterclockwise ¼ turn, lift out | Rinse in warm water; soft brush and dish soap if greasy |
| Lower filter | Directly under the upper assembly | Lift and slide forward | Rinse and gently brush both sides |
KitchenAid’s own care guidance generally suggests checking the filter every month or so. With a household that runs the dishwasher daily or loads plates with lots of food left on them, every two weeks is better. If you notice grit on glasses, don’t wait for the schedule.
Some older KitchenAid models don’t have a removable filter. They use a hard food disposer that grinds debris. If you can’t find a twist-out filter, check the owner’s manual for your model number, printed on the inside edge of the door or tub.
How to Get Rid of a KitchenAid Dishwasher Smell
If the smell comes back quickly after cleaning, work through these one at a time:
- Re-check the filter and sump. A missed piece of food under the filter can keep a smell going.
- Scrub the door seals and bottom lip again. They hold more grime than people expect.
- Check the drain hose. It should rise in a high loop or connect to an air gap so dirty sink water can’t flow back into the tub.
- Run the garbage disposal first. If the dishwasher drains into the disposal, run it before starting a cycle so food in the disposal doesn’t back up.
- Leave the door open after cycles. A closed, damp tub smells musty within days.
- Run hot water at the sink before starting. The first fill will be hot, which cleans better.
Vinegar, Baking Soda, Bleach or Dishwasher Cleaner?
| Option | Best for | Use on a KitchenAid? |
|---|---|---|
| White vinegar (cup on top rack) | Odors, hard water film | Yes, occasionally; frequent use can wear rubber seals |
| Baking soda (sprinkled on floor) | Freshening and light stains | Yes, after the vinegar cycle, not together |
| Dishwasher cleaner tablet | Monthly grease and scale removal | Yes; place in the detergent dispenser |
| Chlorine bleach | Heavy mold on plastic tubs | Generally no; most KitchenAid tubs are stainless steel, which bleach can pit |
Never mix bleach with vinegar. More detail is in can I put bleach in my dishwasher.
KitchenAid Dishwasher Cleaning Schedule
| Task | How often |
|---|---|
| Clear food bits off the tub floor | Weekly |
| Clean the filter | Monthly; every 2 weeks with daily use |
| Wipe door seals and bottom lip | Every 1–2 weeks |
| Vinegar and baking soda deodorizing | Monthly |
| Unclog spray arms | Every 2–3 months, or when dishes come out dirty |
| Wipe the exterior | Weekly |
Give it a little attention every month and it will keep running smoothly, cleaning well and smelling fresh.
Common Mistakes to Avoid
- Running the dishwasher without the filter. Debris goes straight to the pump.
- Using wire brushes or steel wool. They tear the filter mesh and scratch the tub and racks.
- Mixing cleaners. Vinegar and bleach together release harmful fumes.
- Skipping the door seals. The wash cycle never reaches them, so they need hand cleaning.
- Forgetting to restore power correctly. If you flipped the breaker, make sure it’s fully back on before you run the vinegar cycle.
When Cleaning Doesn’t Fix Your KitchenAid Dishwasher
A thorough clean solves most performance and odor problems. If any of these continue afterward, there’s likely a part that needs attention:
- Standing water above the filter after a cycle (drain pump, drain hose or check valve)
- Dishes still dirty with a clean filter and clear spray arms (wash pump or spray arm bearing)
- Blinking lights or error codes that keep returning
- No fill, no heat or poor drying
- Water leaking under the door or a burning smell (stop using it and call a technician)
Find Dishwasher Repair Near You
If your KitchenAid still won’t drain, clean or dry properly after a full clean, compare local appliance technicians and request free quotes. Mention the model number and what you’ve already tried for a more accurate estimate.
Browse dishwasher repair companies · Get free dishwasher repair quotes · Dishwasher repair service guide

Leads Lancer
MonsterInsights, the #1 WordPress Analytics Plugin, helps you easily connect your website to Google Analytics, so that you can see how people find and use your website. Over 3 million website owners use MonsterInsights to see the stats…

Helply Appliance Repair Inc.
Helply Appliance Repair Inc. is listed on Estaril Circle in north Houston, near the Greenspoint and Aldine areas. The company handles washer and dryer repair along with dishwasher repair, range and stove repair, cooktop repair and microwave repair,…
Mega Appliance Repair
This Mega Appliance Repair team covers west Houston, near the Memorial and Spring Branch West areas, providing dishwasher repair, refrigerator repair, freezer repair and dryer repair for homeowners. Phones are answered around the clock Monday through Saturday, with…

Fast Appliance Solutions
Fast Appliance Solutions is located on Story Street in Spring Branch, a short drive from the Katy Freeway and Loop 610. The company handles refrigerator repair, dryer repair and dishwasher repair for Houston homeowners, focusing on getting everyday…

Houston Pro Appliance Repair
Houston Pro Appliance Repair is based on Kailua Drive in Hockley, on the far northwest edge of the Houston area. The company offers appliance repair for local homes and appears in searches for dishwasher repair and oven repair,…

Amerijam Appliance Repair
Amerijam Appliance Repair operates from Wortham Center Drive in northwest Houston, near the Willowbrook and Jersey Village area. The company provides dishwasher repair, stove repair, washer and dryer repair and dryer vent cleaning for homes, giving local residents…
How to Clean a KitchenAid Dishwasher: Frequently Asked Questions
How do I clean the filter on my KitchenAid dishwasher?
Turn off the power, remove the bottom rack, twist the upper filter assembly counterclockwise and lift it out, then slide out the lower filter. Rinse both under warm water, scrub with dish soap and a soft brush if greasy, and lock them back in by turning clockwise.
Where is the filter in a KitchenAid dishwasher?
At the bottom of the tub, in the center of the floor near the lower spray arm. It’s a round twist-out assembly with a flat filter underneath.
How often should I clean my KitchenAid dishwasher?
About once a month: clean the filter and run a vinegar and baking soda deodorizing cycle. Wipe the door seals every week or two and unclog the spray arms every few months.
Can I put vinegar in my KitchenAid dishwasher?
Yes. Place a cup of white vinegar upright on the top rack of the empty dishwasher and run a hot cycle. It deodorizes and removes hard water film. Use it monthly rather than every load.
Can I use baking soda in a KitchenAid dishwasher?
Yes. After the vinegar cycle, sprinkle about a cup of baking soda on the bottom of the tub and run a short hot cycle to freshen the interior.
Why does my KitchenAid dishwasher smell bad?
Usually food trapped in the filter or on the tub floor, grime on the door seals, or drain water flowing back. Clean the filter and seals, check the drain hose loop and leave the door open after cycles.
Do you have to unplug a dishwasher to clean it?
For a deep clean where you remove the filter and spray arms, yes. Unplug it or switch off its breaker so it can’t start accidentally while your hands are inside.
Why is my KitchenAid dishwasher leaving residue on dishes?
A clogged filter, blocked spray arm holes or hard water are the usual causes. Clean the filter and arms, run a vinegar cycle and use rinse aid. If the problem continues, the wash pump may need service.
Related Guides
- How to Clean a Dishwasher
- How to Clean a Moldy Dishwasher
- Can I Put Bleach in My Dishwasher?
- How to Clean a Bosch Dishwasher Filter
- How to Clean Maytag Dishwasher
- Dishwasher Repair Houston
Conclusion
Learning how to clean a KitchenAid dishwasher comes down to a simple monthly routine that keeps it cleaning like new.
- Always cut the power before you reach inside.
- Clear food from the tub floor, then twist out and wash the filter.
- Pop off the spray arms and clear every hole with a toothpick.
- Wipe the interior and door seals with warm soapy water to stop mold and mildew.
- Deodorize with a hot vinegar cycle, then a short baking soda cycle, and leave the door open to dry.
- If it still won’t drain, clean or dry, get free quotes from a local technician.
About This Guide
Editorial policy
This guide was written by David C and reviewed by the Repairior Editorial Team using KitchenAid care guidance and the cleaning routine appliance technicians use in customers’ homes. We update our guides when manufacturer guidance changes. Businesses cannot pay to be featured in our how-to content.
Content transparency
Filter designs and cycle names vary by KitchenAid model and year. Follow your owner’s manual where it differs from this guide. Repairior is not affiliated with KitchenAid and earns revenue from optional business plans, which do not affect this guide.
About the author
David C is part of the Repairior Editorial Team, which researches home appliance care and repair and works with local repair businesses across the US, helping homeowners keep appliances running well and know when it’s time to call a pro.
Helpful official resource: KitchenAid owner support.
Compare dishwasher repair technicians near you and request free quotes in minutes.