In this article
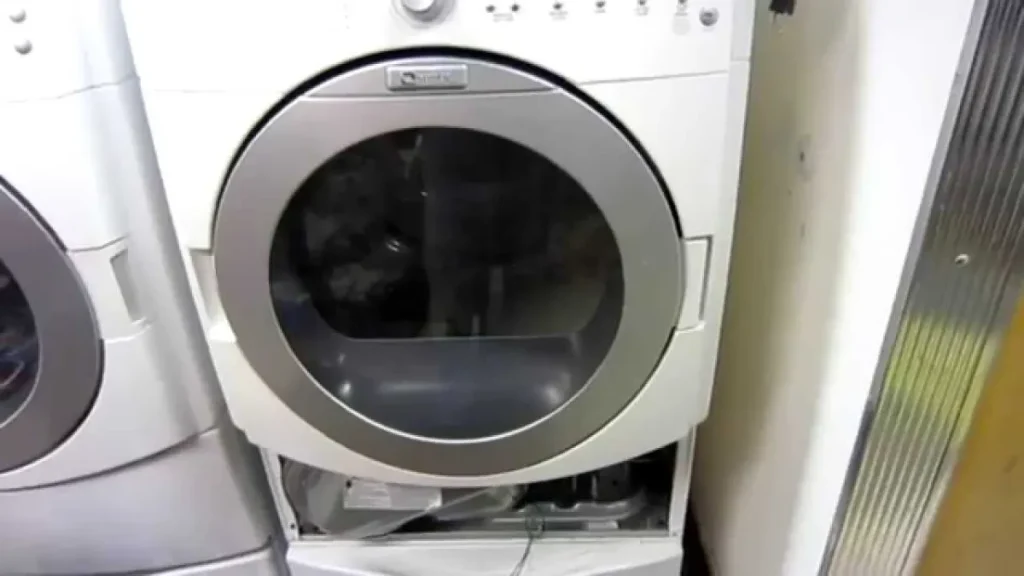
A Maytag dryer not heating, while the drum still turns, is most often caused by a burned-out heating element or a blown thermal fuse. On newer Maytag electric dryers the element sits inside the cabinet behind the drum, so you have to take the front of the dryer apart to reach it. It sounds like a big job, but with a nut driver, a Torx bit and a multimeter, most people can test and replace the element in about an hour. This guide shows you how.
Why Is My Maytag Dryer Not Heating?
| Cause | How common | Clue |
|---|---|---|
| Burned-out heating element | Most common | Drum turns, air is room temperature |
| Blown thermal fuse or thermal cutoff | Very common | No heat, or the dryer won’t start on some models |
| Tripped breaker half or loose power cord | Common | Runs normally but stays cold |
| Faulty high-limit or cycling thermostat | Occasional | Heat cycles wrongly or fuses keep blowing |
| Control board relay | Less common | All heat parts test good |
| Clogged vent or lint buildup | Root cause of most failures | Long dry times, hot cabinet |
Start with the easy check: reset the dryer’s double breaker fully off and back on. An electric dryer needs 240 volts to heat but only 120 to spin, so losing one side of the breaker leaves you with a tumbling, cold dryer.
Tools You’ll Need
- Drill or nut driver with a 1/4-inch hex bit
- T15 Torx bit
- Phillips screwdriver
- Multimeter with a continuity setting
- Vacuum with a crevice tool
- Phone camera for wiring photos
Step 1: Open the Dryer
These steps match the newer Maytag electric dryers built on the front-access design. Your model may differ slightly, so photograph each stage.
- Unplug the dryer and pull it away from the wall.
- Remove the back panel. Take out the 1/4-inch screws around the lower rear panel (about six), then the two screws that hold the top at the back.
- Remove the top. Lift one side and slide the top forward and back off its clips.
- Disconnect the door switch and remove the two T15 screws at the top of the front panel.
- Remove the lower screws: four 1/4-inch screws along the bottom, then open the door and remove two Phillips screws inside the door opening.
- Lift off the front panel and set it aside.
- Remove the front bulkhead. Take out the six screws (four at the top, two at the bottom), disconnect the two wires attached to it, and wiggle it free.
Step 2: Remove the Belt and Drum
Reach under the drum, push the idler pulley to release the belt tension, and slip the belt off the motor pulley and idler. Then grab the belt and slide the drum out of the cabinet. With the drum out, you’ll see the heating element housing along the bottom and a lot of lint. Vacuum everything thoroughly, especially around the element, the motor and the blower. Lint near a heating element is a fire risk.
Step 3: Test the Heating Element and Thermal Fuse
Set your multimeter to continuity and touch the probes together to confirm it beeps.
- Heating element: disconnect its wires and touch one probe to each terminal. A beep (or a reading of roughly 10 ohms) means the coil is intact. No beep means it has broken and needs replacing.
- Thermal fuse: disconnect its two wires and test across the terminals. A beep means it’s good; no beep means it has blown.
- Thermostats: while you’re there, test the high-limit thermostat and thermal cutoff on the heater housing. Each should show continuity at room temperature.
A blown fuse or cutoff is a symptom, not just a failure. Something made the dryer overheat: usually a clogged vent, or a thermostat that didn’t switch off. Fix that cause or the new fuse will blow again.
Step 4: Replace the Heating Element
- Remove the screw holding the element (bend the small retaining tab down if your model has one).
- Pull the two wires off the terminals.
- Slide the old element straight out of its housing.
- Set the new element on the side rails and slide it all the way in.
- Reinstall the screw, reconnect both wires, and bend the tab back up. The metal edges are sharp, so work carefully.
Step 5: Reassemble and Test
- Set the drum back in place. Loop the belt around the drum, then route it around the idler pulley and motor pulley so the idler holds tension.
- Turn the drum by hand. The blower should turn with it, which confirms the belt is on correctly.
- Refit the front bulkhead, pushing gently at the bottom and turning the drum until it seats. Make sure no panel edge touches the blower.
- Reconnect the two bulkhead wires and the door switch, then reinstall the front panel, top and back panel.
- Plug the dryer in. If the display shows a power-failure message, that’s normal after unplugging; just press a button to clear it.
- Run a timed dry on high heat and check the air temperature with a thermometer. It should climb steadily within a few minutes.
Still No Heat After Replacing the Element?
- Check the power supply: measure about 240 volts across the two outer terminals of the terminal block, and inspect the cord connections for burn marks.
- Test the cycling thermostat on the blower housing for continuity.
- Check the control board relay that sends power to the element, using the wiring diagram tucked inside the console.
- Gas models: look for an igniter that glows without lighting the gas (gas valve coils) or no glow at all (igniter or flame sensor). Leave gas work to a qualified pro.
Maytag Dryer No-Heat Repair Costs
Part prices are typical online prices; professional prices include parts and labor based on 2025–2026 U.S. repair-cost data.
| Repair | Part only (DIY) | With a technician |
|---|---|---|
| Heating element | $40 – $90 | $150 – $350 |
| Thermal fuse or cutoff | $10 – $25 | $100 – $200 |
| High-limit or cycling thermostat | $15 – $40 | $120 – $220 |
| Control board | $120 – $300 | $250 – $500 |
| Dryer vent cleaning | — | $100 – $200 |
Find a Dryer Repair Pro
Not comfortable taking the cabinet apart, or the new element didn’t fix it? A dryer technician can diagnose it in one visit. Compare quotes before you book.
Find dryer repair companies Get free quotes Same-day service
Questions and Answers
Why is my Maytag dryer running but not heating?
The motor needs 120 volts but the element needs 240. A broken heating element, a blown thermal fuse or a tripped breaker half are the usual causes.
Where is the heating element on a Maytag dryer?
On many newer Maytag electric dryers it’s inside the cabinet behind the drum, so you remove the front panel and drum to reach it. Older models put it in a heater box behind the rear panel.
Where is the thermal fuse on a Maytag dryer?
It’s usually on the blower or heater housing at the lower part of the cabinet. Follow the wires from the heating element area to find it.
How do I know if my Maytag dryer heating element is bad?
Test it with a multimeter on continuity. No beep means the coil has broken. A visible gap in the coil confirms it.
Does a Maytag dryer have a reset button?
Most don’t. Unplugging it for a minute resets the controls, but a blown thermal fuse or cutoff has to be replaced.
How long does it take to replace a Maytag dryer element?
About 45–90 minutes for a first-timer, most of it taking the cabinet apart and putting it back together.
Why does my new element burn out quickly?
Restricted airflow or a faulty thermostat. Clean the vent duct and lint chute, and test the high-limit and cycling thermostats.
How much does it cost to fix a Maytag dryer not heating?
DIY parts usually cost $10–$90. With a technician, most no-heat repairs cost $100–$350.
Is a Maytag dryer the same as a Whirlpool?
Maytag is owned by Whirlpool, and many models share parts and designs. Our Whirlpool dryer heat guide covers the thermostat and fuse tests in more detail.
Should I repair or replace my Maytag dryer?
No-heat repairs are usually worth doing, since the parts are inexpensive. Consider replacing only if the drum, motor and board are failing on a dryer over 12–15 years old.
The Bottom Line
For a Maytag dryer not heating, reset the breaker first, then open the cabinet and test the heating element and thermal fuse. Replace whichever part has no continuity, vacuum out all the lint, and check that the vent is clear so the new part lasts. For more causes that apply to every brand, see our guide on why a dryer stops heating.
About This Guide
This guide was written by David C, Senior Technical Writer at Repairior, based on hands-on appliance repair steps and reviewed by our editorial team. Disassembly steps vary by model, so check your dryer’s service sheet. Cost ranges reflect published 2025–2026 U.S. repair pricing, and we update our guides when pricing or best practices change.
Compare reviewed dryer repair companies and request free quotes in minutes.